How to create a kubernetes cluster with Talos & Proxmox
I have created a couple of K3s clusters recently, it's a super easy thing to set up. I wanted to give myself a challenge, therefore I moved over to Talos. Talos is an OS with Kubernetes baked in, it's main use is for BareMetal, you can also use virtualised platforms such as Proxmox.
Let's get started!
Install talosctl
First, we need to install the talosctl cli via:
curl -sL https://talos.dev/install | sh
Getting the ISO image
To install Talos in Proxmox, you will need the ISO image from the Talos release page. You can download metal-amd64.iso via github.com/siderolabs/talos/releases.
Once you have this you can upload it into your Proxmox cluster, I have an NFS share set up where I store my images. Upload the image to where you need it.
Create the VMs
Let's create some VMs for our cluster, first, we're going to create our first control plane node. Let's familiarise ourselves with the system requirements for Talos and assign VM resources accordingly.
Minimum Requirements
| Role | Memory | Cores | System Disk | | ------------ | ------ | ----- | ----------- | | Control Plan | 2 Gib | 2 | 10 Gib | | Worker | 1 Gib | 1 | 10Gib |
Recommended | Role | Memory | Cores | System Disk | | ------------ | ------ | ----- | ----------- | | Control Plan | 4 Gib | 4 | 100 Gib | | Worker | 2 Gib | 2 | 100 Gib |
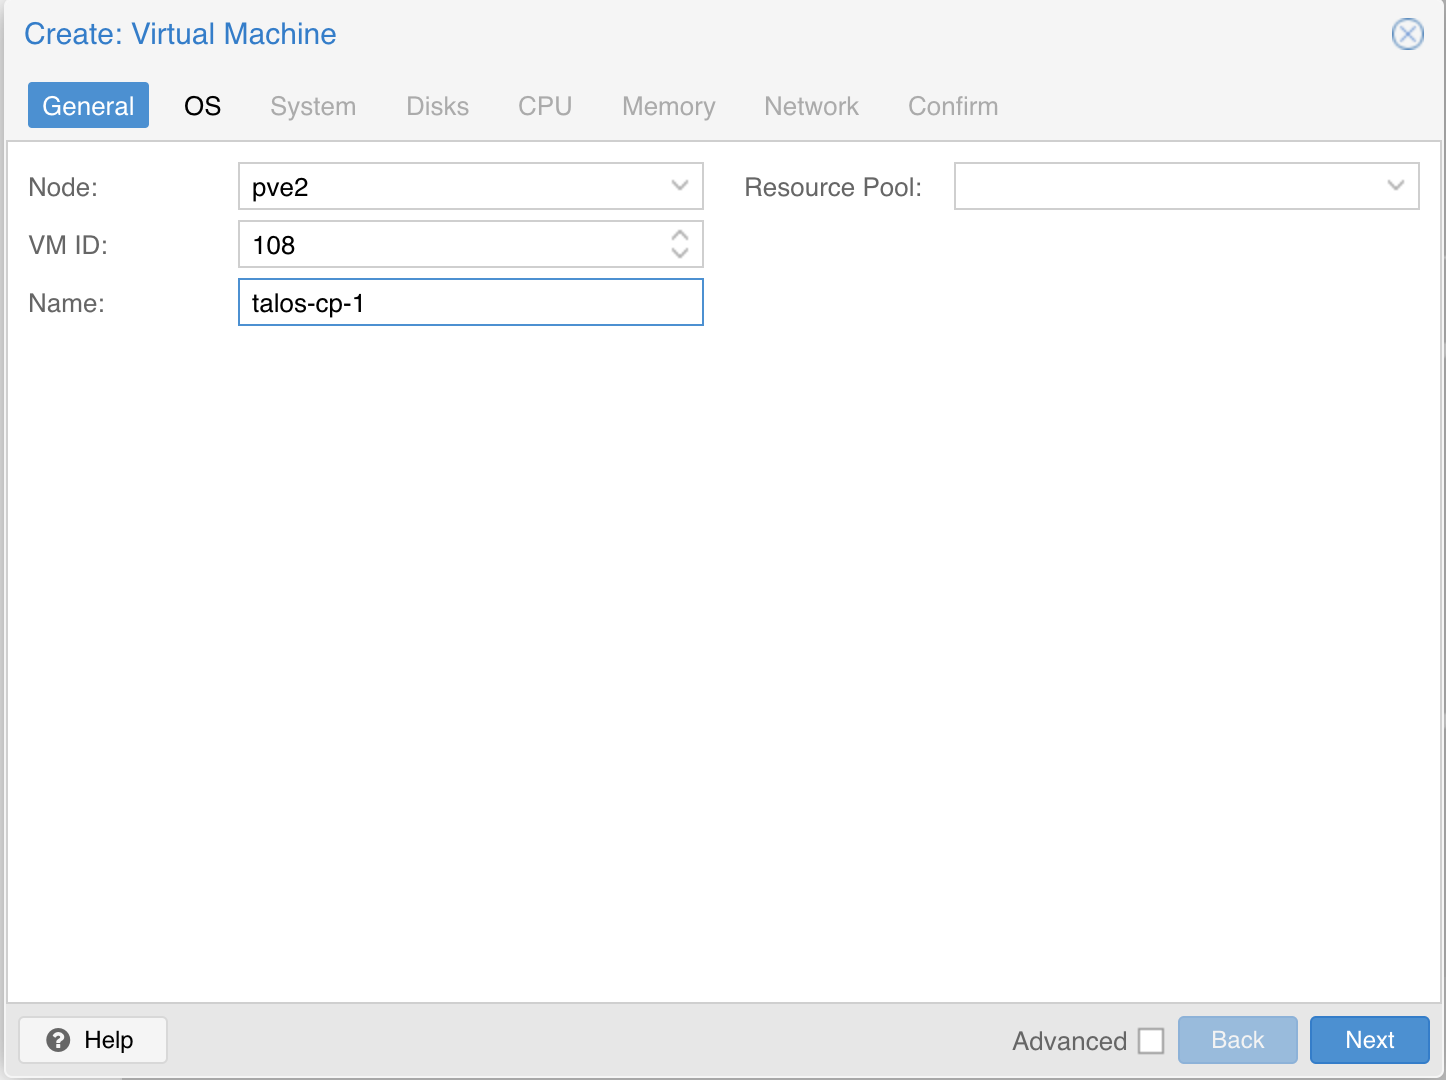
Create a new VM by clicking the “Create VM” button in the Proxmox UI and filling out a name for the new VM:
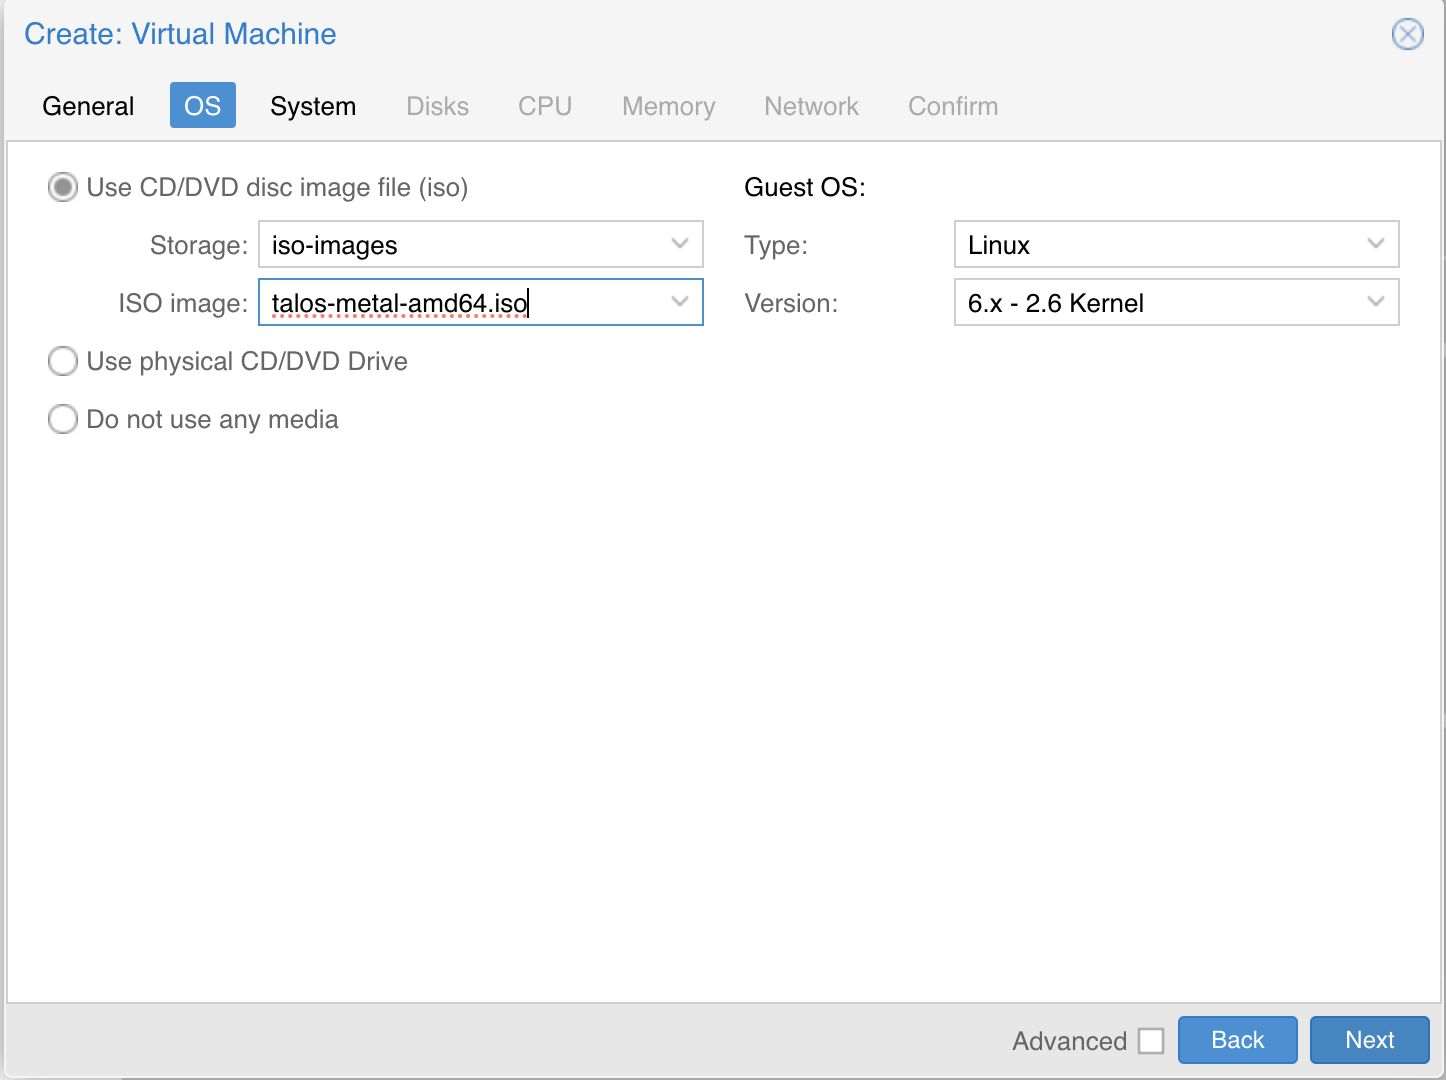
In the OS tab, select the ISO we uploaded earlier:
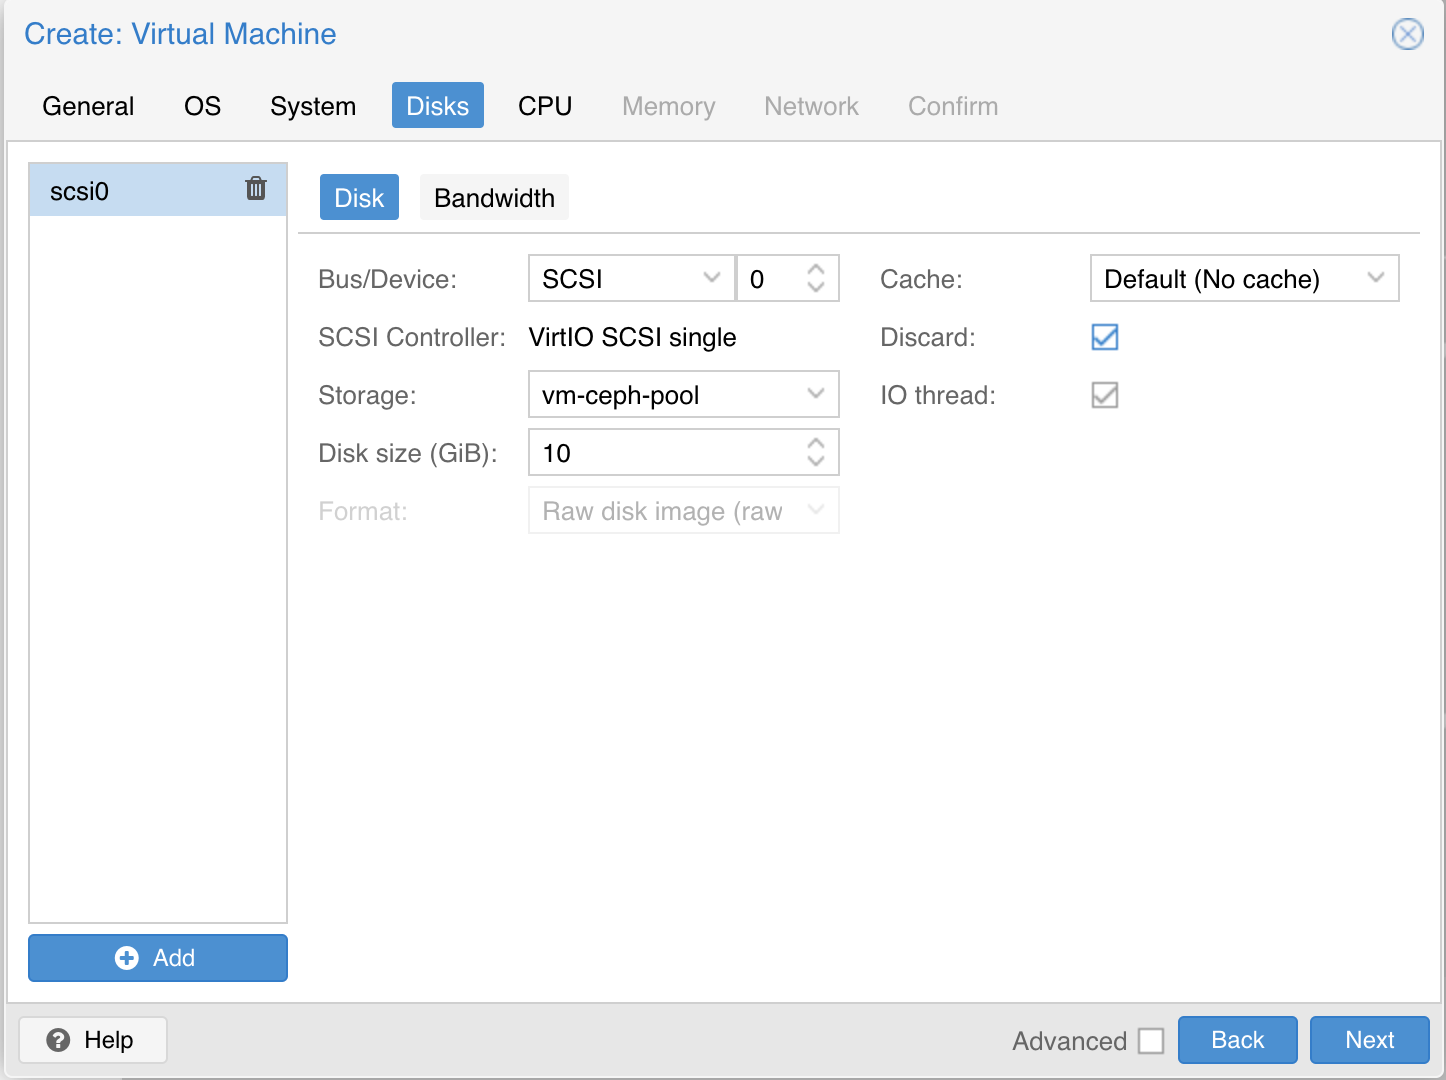
Keep the defaults set in the “System” tab. Also keep the defaults in the “Hard Disk” tab as well, only changing the size if desired. Here we are using the Proxmox Ceph storage.
In the “CPU” section, give at least 2 cores to the VM:
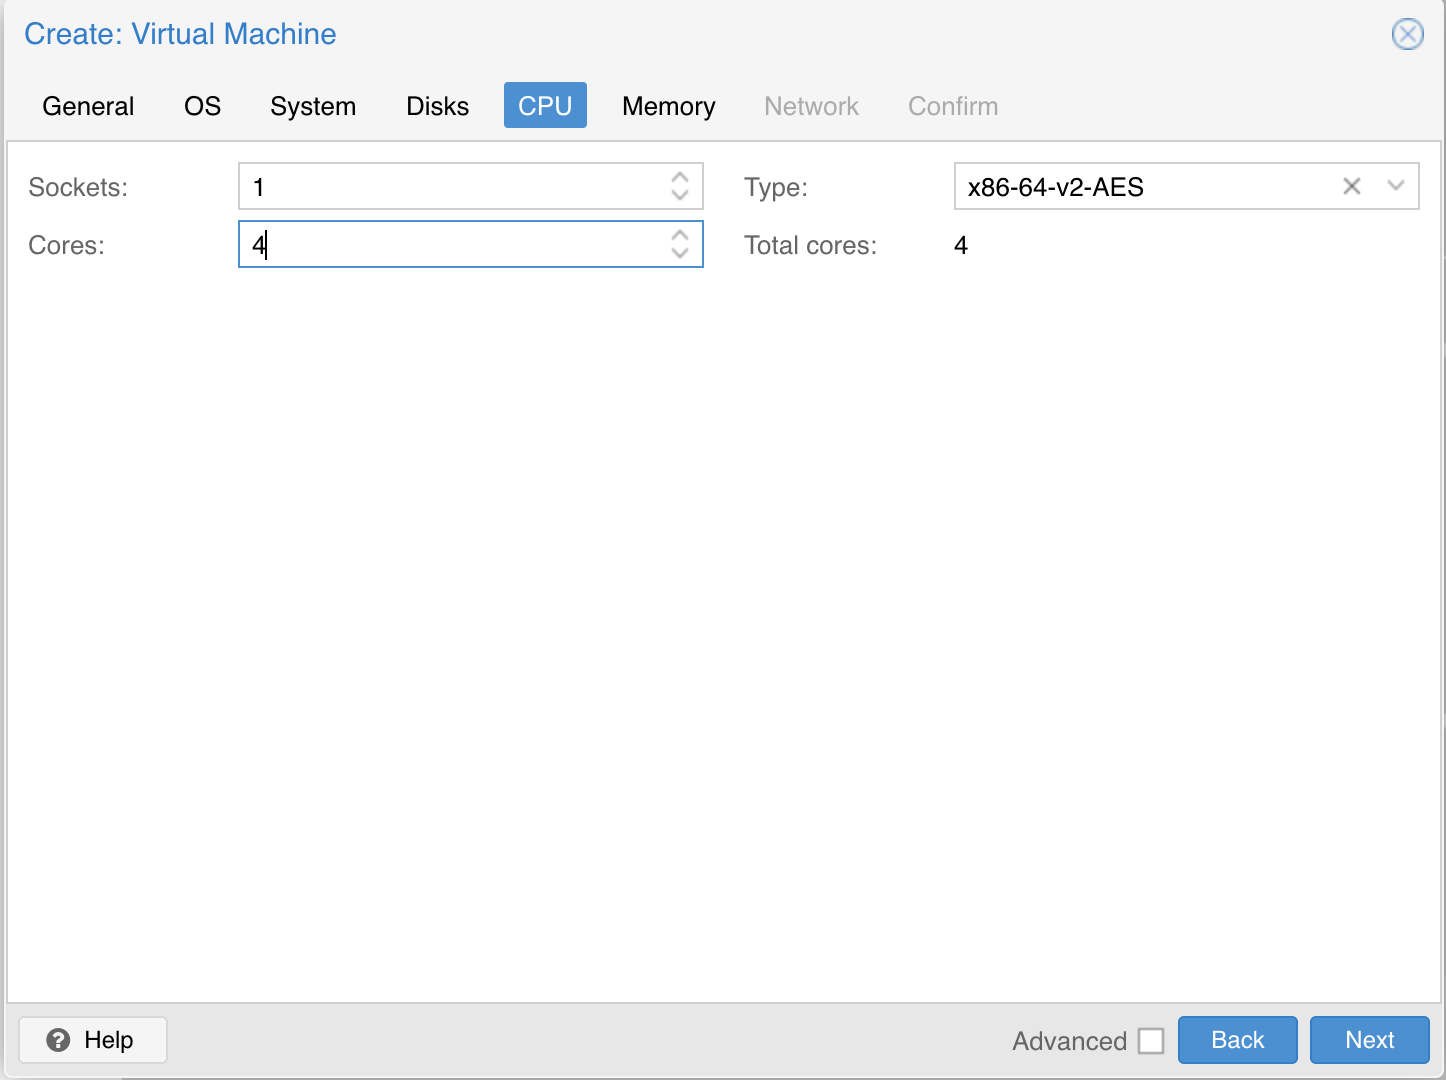
Note: As of Talos v1.0 (which requires the x86-64-v2 microarchitecture), prior to Proxmox V8.0, booting with the default Processor Type kvm64 will not work. You can enable the required CPU features after creating the VM by adding the following line in the corresponding /etc/pve/qemu-server/
.conf file: args: -cpu kvm64,+cx16,+lahf_lm,+popcnt,+sse3,+ssse3,+sse4.1,+sse4.2Alternatively, you can set the Processor Type to host if your Proxmox host supports these CPU features, this however prevents using live VM migration.
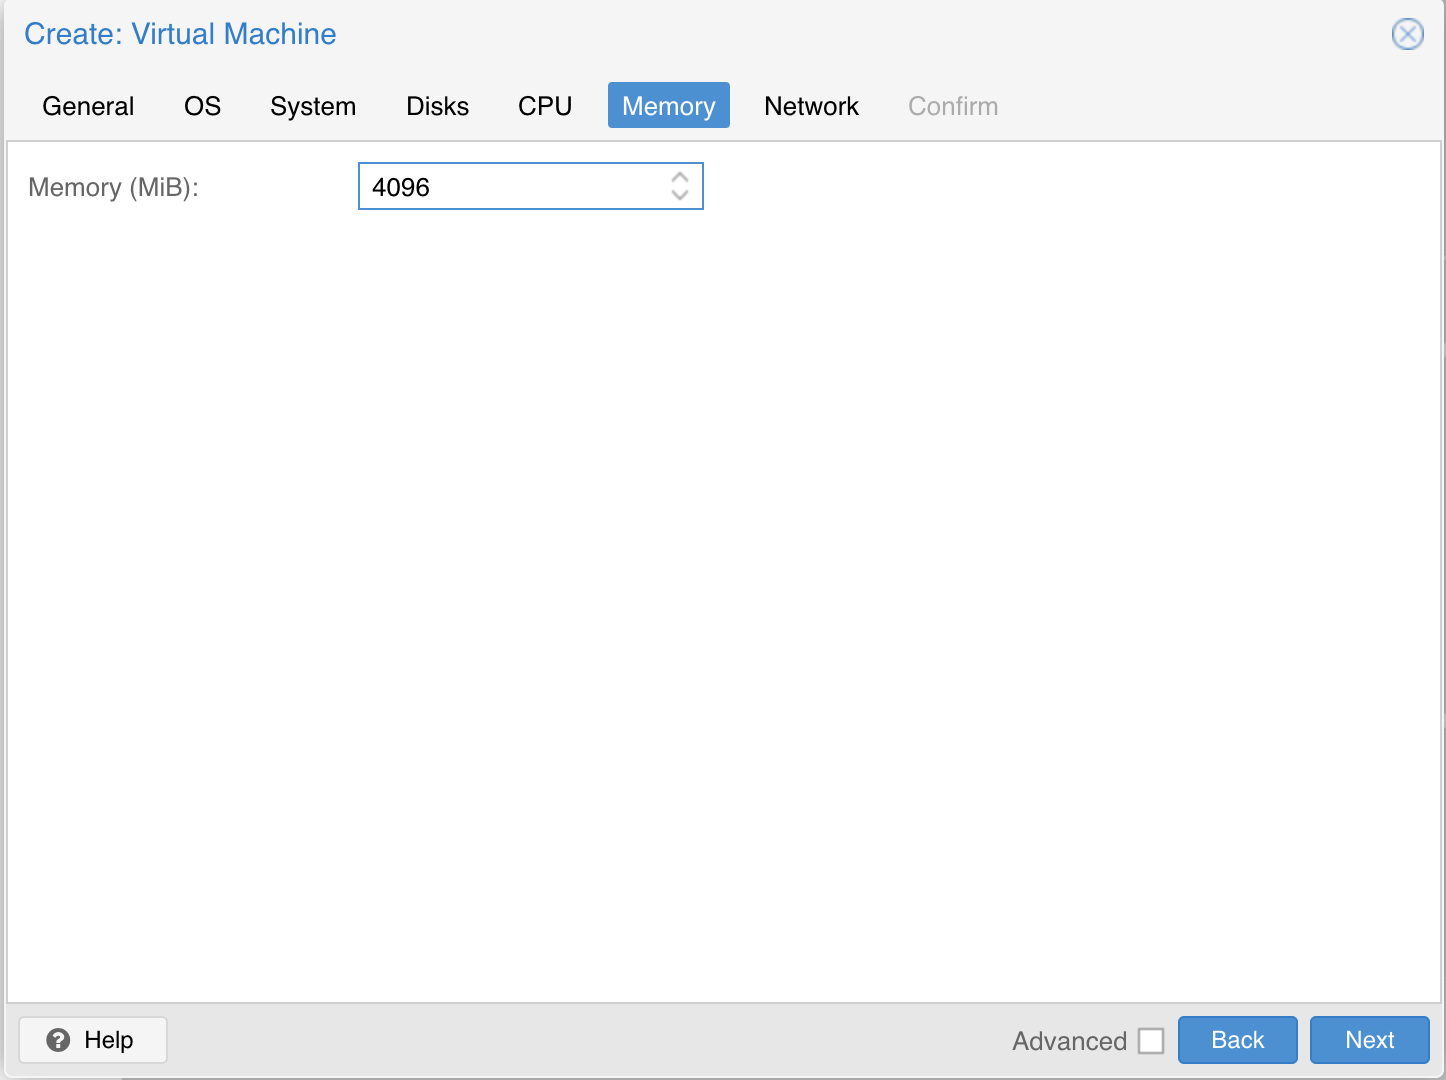
Verify that the RAM is set to at least 2GB:
Keep the default values for networking, verifying that the VM is set to come up on the bridge interface:

Finish creating the VM by clicking through the “Confirm” tab and then “Finish”.
Repeat this process for a second VM to use as a worker node. You can also repeat this for additional nodes desired.
Start the VM (Our first control plane)
Once the VMs have been created and updated, start the VM that will be the first control plane node. This VM will boot the ISO image specified earlier and enter “maintenance mode”.
Once the machine has entered maintenance mode, there will be a console log that details the IP address that the node received.
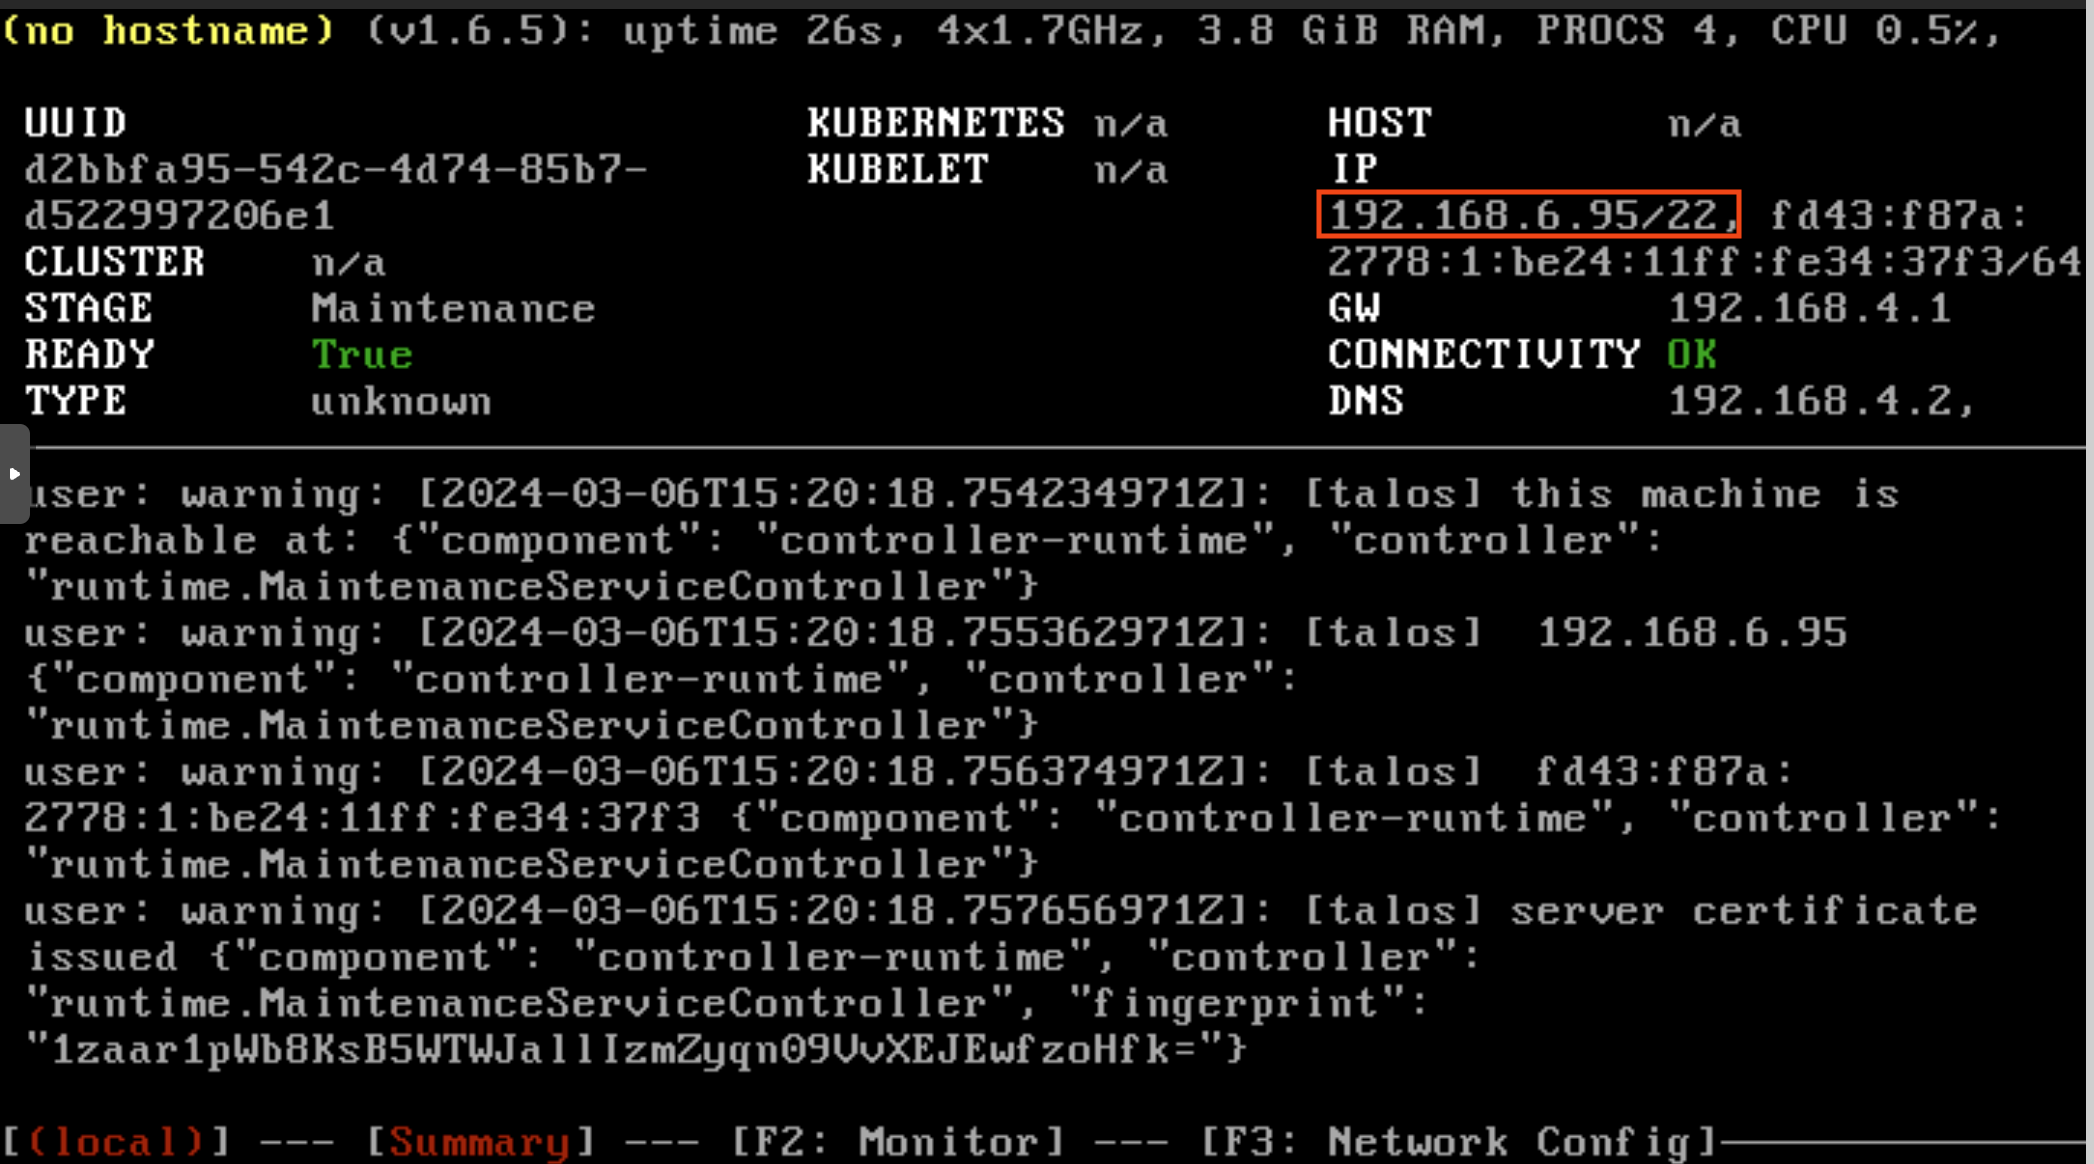
This is the IP in the red box, make sure to note this we need this later.
Generate machine config files
Now it's time to generate our config files, with Talos ssh is disabled, and all configuration is done with talosctl and the config files. This is super nice as you don't have to always be using ssh into boxes to change configs.
With this tutorial, we're going to be making a High Availablity cluster. This requires at least three control planes and the use of a VIP which is a virtual (shared) IP, pick this ahead of time, just make sure nothing on your network is using that IP. To create the config files we need to run:
talosctl gen config <cluster name> https://<VIP>:6443 --output-dir <where you want to store the files>

# real life example:
talosctl gen config talos-cluster https://192.168.7.200:6443 --output-dir /talos/servers
This will create several files in the chosen directory: controlplane.yaml, worker.yaml, and talosconfig.
Creating our control plane
Now it's time to send our configuration to our first control plane. If you look in my talos directory you can see that I have a .yaml for each one of my nodes. This is because I have given them a static IP. You can take a look at one of my configs here.
99.9% of the file is default apart from the extraMounts, network and disks settings which I have amended to fit my needs, they're below:
kubelet:
    image: ghcr.io/siderolabs/kubelet:v1.29.2
    defaultRuntimeSeccompProfileEnabled: true
    disableManifestsDirectory: true

    extraMounts:
      - destination: /var/mnt/storage
        type: bind
        source: /var/mnt/storage
        options:
          - bind
          - rshared
          - rw

  # Provides machine specific network configuration options.
  network:
    hostname: talos-cp-1
    nameservers:
      - 192.168.4.100
      - 1.1.1.1
    interfaces:
      - deviceSelector:
          busPath: "0*"
        addresses:
          - 192.168.5.1/22
        routes:
          - network: 0.0.0.0/0
            gateway: 192.168.4.1
        vip:
          ip: 192.168.5.200
  time:
    servers:
      - time.cloudflare.com
disks:
  - device: /dev/sdb
    partitions:
      - mountpoint: /var/mnt/storage
With this network config, everything is pretty straightforward, however, I found I had to use a deviceSelector as I wasn't sure what interface I was on. Because you can't ssh into the machine like you can on an ubuntu vm to run ip a I used a Predictable Interface Names.
Ok, so we have our config files all set. Create one for each one of your VMs, before applying them let's make sure they're all valid. For this, we can run the following:
talosctl validate --config talos-cp-1-controlplane.yaml --mode metal
talosctl validate --config talos-cp-2-controlplane.yaml --mode metal
talosctl validate --config talos-cp-3-controlplane.yaml --mode metal
talosctl validate --config talos-wk-1-worker.yaml --mode metal
talosctl validate --config talos-wk-2-worker.yaml --mode metal
talosctl validate --config talos-wk-3-worker.yaml --mode metal
Thanks to MichaelCade for this one.
If you get a successful message back they're good to go.
Apply the cluster configuration to each node
Now that we have our config files and we have our physical nodes ready with a static IP we can now apply said config to our nodes.
Note - I have modified the controlplane.yaml with several additional configurations required for my setup, so please do change your config files for your needs.
Remember that IP in the red box from earlier. Now we can use that to apply our config files. Run the following, this is going to set up your first VM as a control plane node with the controlplane.yaml you created.
talosctl apply-config \
 --nodes 192.168.6.95 \
 --endpoints 192.168.6.95 \
 --file talos-cp-1-controlplane.yaml \
 --insecure
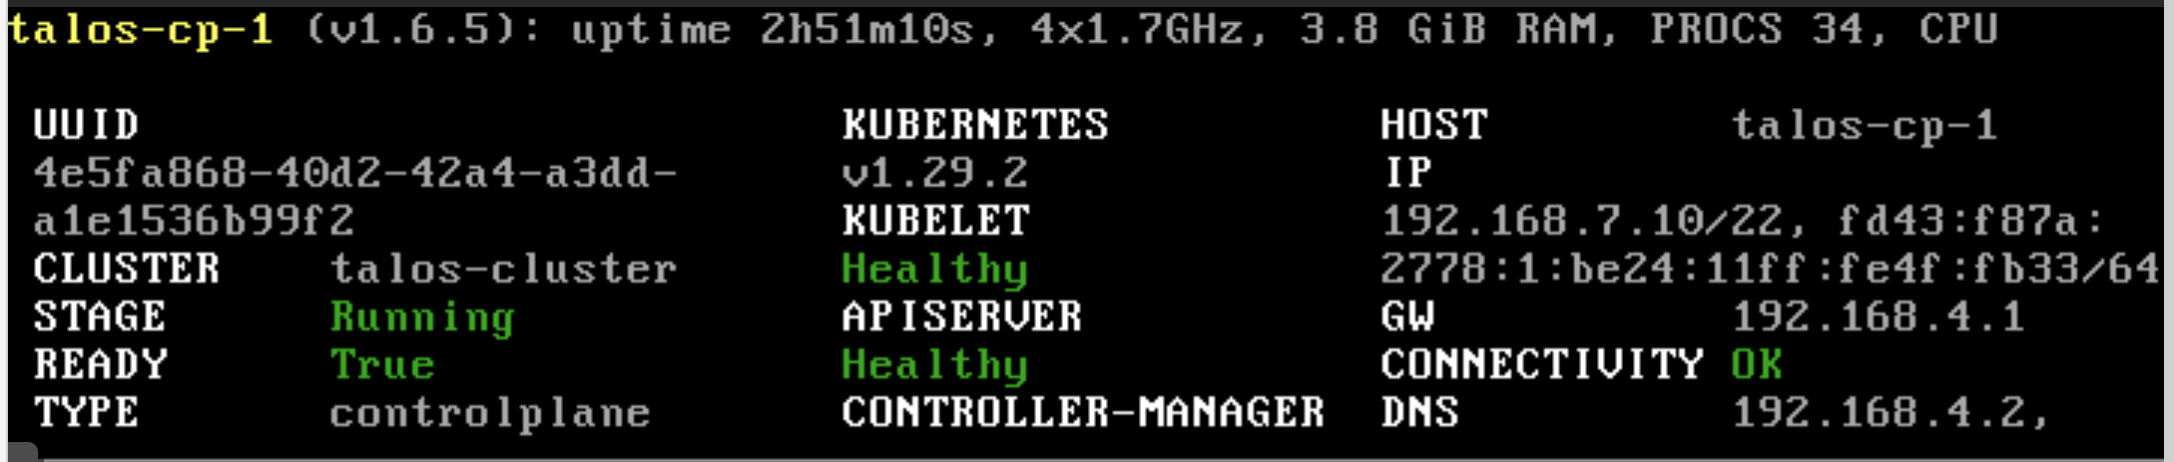
If you check back on the console of the node in Proxmox you will start to kick into life, after a few moments you should see something like this:
Using the cluster
Once the cluster is available, you can make use of talosctl and kubectl to interact with the cluster. For example, to view current running containers, run talosctl containers for a list of containers in the system namespace, or talosctl containers -k for the k8s.io namespace. To view the logs of a container, use talosctl logs <container> or talosctl logs -k <container>.
I found that when using talosctl you had to include your talosconfig file in the cmd like so:
talosctl --talosconfig talosconfig containers -k
First, configure talosctl to talk to your control plane node by issuing the following, updating paths and IPs as necessary:
export TALOSCONFIG="talosconfig"      # where you have your talosconfig
talosctl config endpoint 192.168.7.10
talosctl config node 192.168.7.10
This will update your talosconfig file with the IP of the first control plane.
talosctl bootstrap
Once the cluster has been bootstrapped we can now retrieve the kubeconfig file by:
talosctl kubeconfig .
This will export the config file to your directory, I copied and pasted the required parts to my .kube/config so I can connect to multiple clusters, then deleted the file.
Adding more nodes
For me, I copied my first config file and simply renamed if and changed two things
- hostname
- addresses
With the above, you're giving your next node a new host name and a different static IP. Next run the following, using the example below change the IP address mentioned in the talos boot screen.
talosctl apply-config --insecure \
--nodes 192.168.6.xx \
--file talos-cp-2-controlplane.yaml
If you want to add a worker node, repeat the process but use your worker.yaml file, you can see an example of mine here.
Checking everything is working
Now let's see how our nodes are getting on, because you have copied the kube config file over to your .kube/config you can use your dev machine to interact with your cluster. Like so...
➜ k get nodes
NAME         STATUS   ROLES           AGE   VERSION
talos-cp-1   Ready    control-plane   32m   v1.29.2
talos-cp-2   Ready    control-plane   19m   v1.29.2
talos-cp-3   Ready    control-plane   12m   v1.29.2
talos-wk-1   Ready    <none>          10m   v1.29.2
talos-wk-2   Ready    <none>          79s   v1.29.2
talos-wk-3   Ready    <none>          61s   v1.29.2
And there we have it. A new Talos cluster running in Proxmox, now you can interact with it like any other cluster.